
This article lays out the steps to prepare an image that can be used for GCE and GCE bare-metal instances to run Proxmox Virtual Environment (PVE). PVE is a solution similar to VMware and Nutanix that allows for management of fleet of VMs. Especially for scenarios like datacenter exits or migrations from on-premises customers look for solutions that allow them to easily transition to a virtualization solution if they are not ready for standard Google Compute Engine (GCE) VMs or if there are technical constraints that requires them to explore alternatives.
The steps outlined use GCE bare-metal instances that are ideally positioned for 3rd party hypervisors like Proxmox as they are not using virtualization and thus provide the perfect foundation to run virtualized environments. Internal configuration of PVE such as networking or storage is not part of this guide.
Prepare and create image#
As the first step, we need to create an image. While the easiest is to start with an existing image provided by Google Cloud as it has all the pieces already configured in the right way this also requires some extra step to make sure the partitions on the primary disk are configured correctly. More of that later.
Deploy installer VM#
Lets get started by deploying an instance that is used to install the bits and make the necessary configuration adjustments. We’re using a C4 spot instance for the initial configuration. The following command will deploy a c4-standard-8 instance. We’re further using the default subnet and don’t expose a public IP to this instance.
export ZONE=europe-west4-a
export INSTANCE=proxmox-installer
gcloud compute instances create $INSTANCE \
--zone $ZONE \
--machine-type c4-standard-8 \
--network-interface=nic-type=gvnic,stack-type=IPV4_ONLY,subnet=default,no-address \
--tags=iap-ssh \
--create-disk boot=yes,type=hyperdisk-balanced,image-project=debian-cloud,image-family=debian-13,provisioned-iops=3000,provisioned-throughput=140,size=10,name=proxmox-installer,device-name=proxmox-installer \
--create-disk type=hyperdisk-balanced,provisioned-iops=3000,provisioned-throughput=140,size=15,name=proxmox,device-name=proxmox \
--no-restart-on-failure \
--maintenance-policy=TERMINATE \
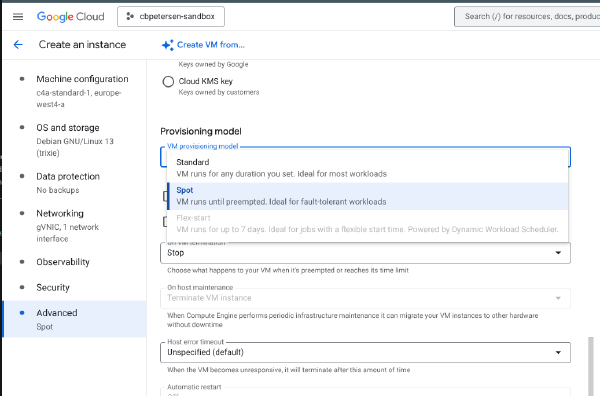
--provisioning-model=SPOT \
--instance-termination-action=STOP \
--shielded-secure-boot \
--shielded-vtpm \
--shielded-integrity-monitoringCreate firewall rule for IAP access#
As the VM is not directly exposed to the internet we need to allow IAP access to it. proxmox-installer has already been deployed with a network tag (see the --tags=iap-ssh argument above) that we can use to allow IAP access to it.
export NETWORK=default

gcloud compute firewall-rules create allow-ssh-iap \
    --network $NETWORK \
    --priority 5000 \
    --direction INGRESS \
    --action ALLOW \
    --rules tcp:22 \
    --source-ranges 35.235.240.0/20 \
    --target-tags iap-ssh
SSH into installer VM#
Now we can log into the instance and start configuring PVE. As SSH is not publicly exposed, we need to tunnel through IAP. Luckily gcloud makes this very easy:
export ZONE=europe-west4-a
export INSTANCE=proxmox-installer

gcloud compute ssh $INSTANCE \
    --project $PROJECT \
    --zone $ZONE \
    --tunnel-through-iap
Prepare image#
The following steps will install PVE, make necessary changes to the disk layout and update the boot process.
Install PVE#
sudo wget https://enterprise.proxmox.com/debian/proxmox-archive-keyring-trixie.gpg -O /usr/share/keyrings/proxmox-archive-keyring.gpg
cat <<EOF | sudo tee /etc/apt/sources.list.d/pve-install-repo.sources > /dev/null
Types: deb
URIs: http://download.proxmox.com/debian/pve
Suites: trixie
Components: pve-no-subscription
Signed-By: /usr/share/keyrings/proxmox-archive-keyring.gpg
EOF
sudo apt update
sudo apt full-upgrade
# Install PVE packages
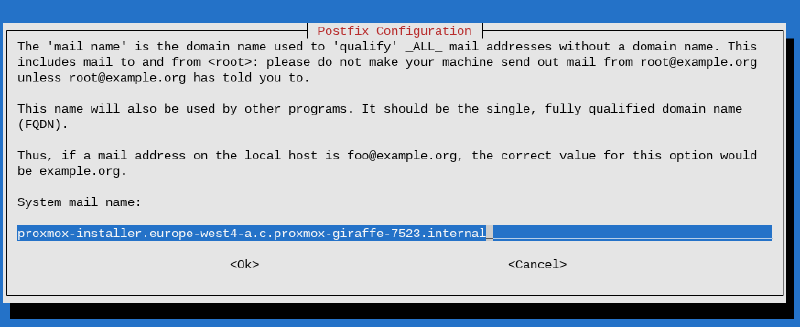
sudo apt install proxmox-ve postfix open-iscsi chrony systemd-boot-tools systemd-boot-efi fdiskDuring the installation process you’ll be asked to configure Postfix:
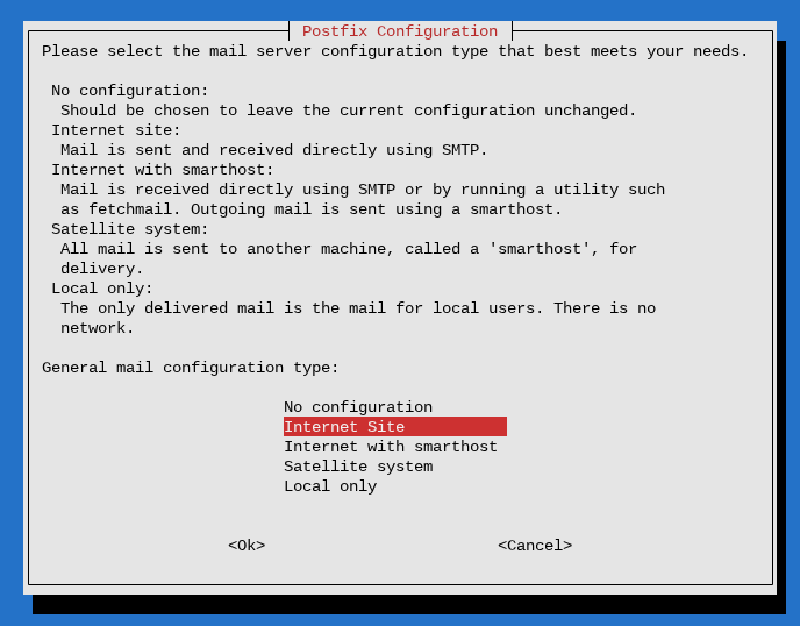
Make sure to follow the PVE best practices to ensure email delivery. For testing purposes you select Local only, which will only requires the mail name:
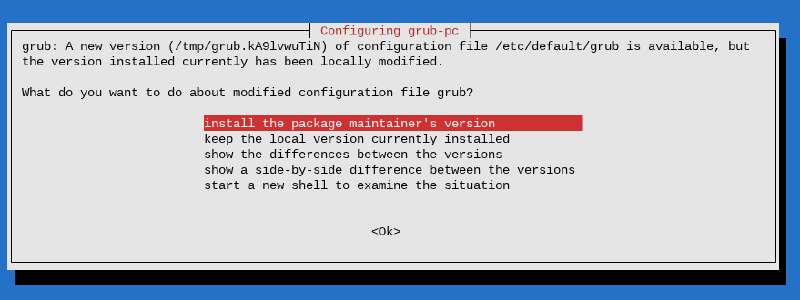
When GRUB is configured during the installation process you may be asked whether you want to override the current configuration. As we will remove GRUB later it is safe to install the package maintainers version of the GRUB configuration:
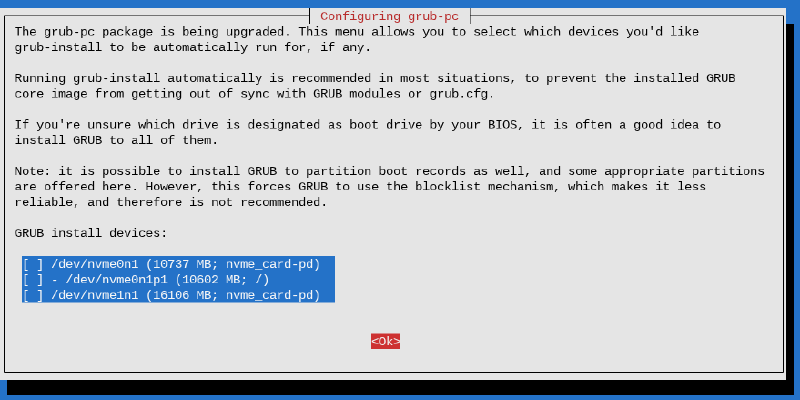
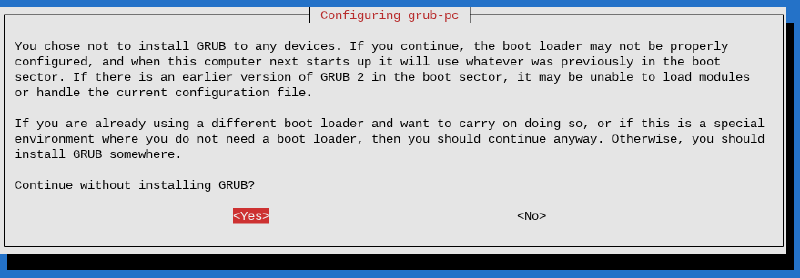
Then you will be prompted where to install GRUB boot data. Continue without installing GRUB:
Confirm when the installation confirms that you don’t want to have GRUB installed.
In the next steps we will update the boot process to systemd-boot and GRUB is no longer required.
This is a good moment to take a snapshot in case you need to go back at a later date to change/update/fix something:
export ZONE=europe-west4-a
export DISK=proxmox-installer
export SNAPSHOT=proxmox-installer-$(date '+%Y%m%d')

gcloud compute instant-snapshots create $SNAPSHOT \
    --zone $ZONE \
    --source-disk $DISK
Fix partition table layout#
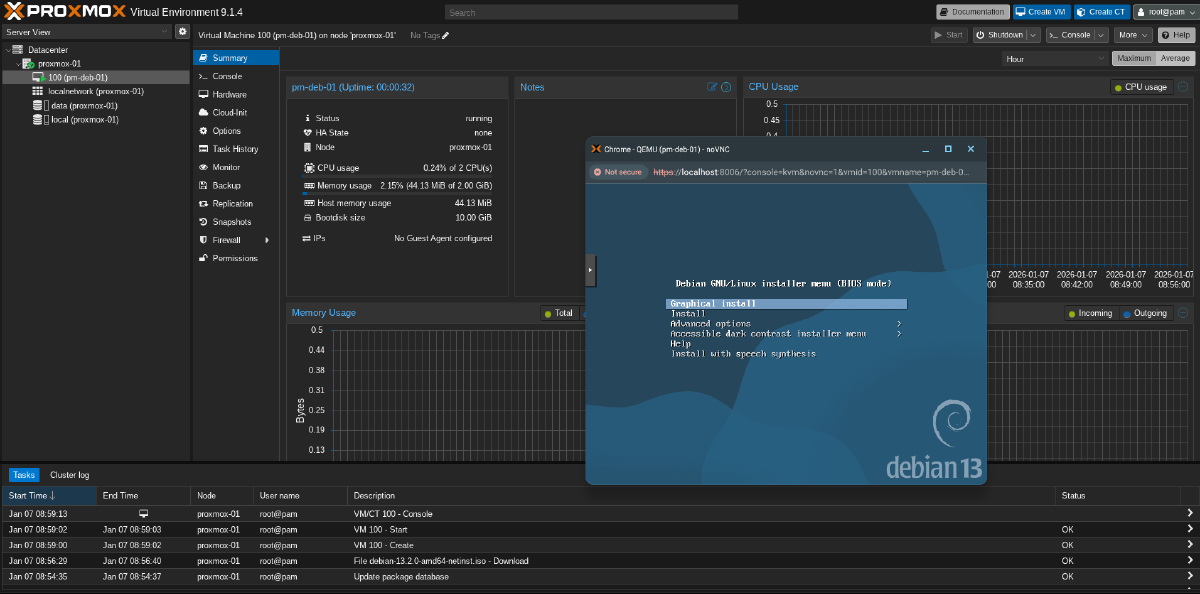
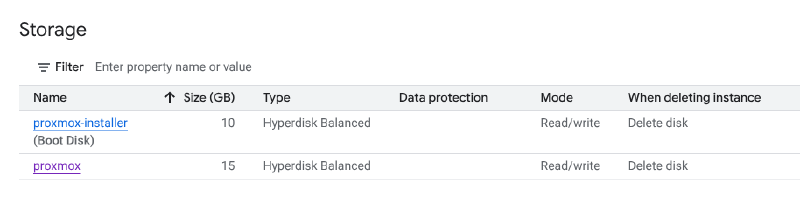
When you review the hardware configuration of the proxmox-installer VM you will notice that two disks are attached to it:
As we have used the Debian 13 image provided by Google Cloud (note image-family=debian-13 in the first --create-disk argument), the default configuration will see that the primary partition is grown to full the entire disk. The disk has a BIOS boot partition sized at 3 MiB and a EFI boot partition (ESP) sized at 125 MiB. PVE requires the ESP to be sized at >= 256 MiB to work with their proxmox-boot-tool. In order to facilitate that we need to shift the layout of the partition table.
The EPS is created at the start of the partition, which allows the primary partition to be grown if that is required at a later date.
# Create partitions on second disk
DEVICE=$(sudo readlink -f /dev/disk/by-id/google-proxmox)
cat <<EOF | sudo sfdisk $DEVICE
label: gpt
unit: sectors

${DEVICE}p15 : start=2048, size=1048576, type=C12A7328-F81F-11D2-BA4B-00A0C93EC93B
${DEVICE}p1  : start=1050624, type=0FC63DAF-8483-4772-8E79-3D69D8477DE4
EOF
Update disk references and copy bits#
With the partition table updated on the secondary disk, a few references need to be updated. We must create /etc/kernel/cmdline as proxmox-boot-tool uses it to add kernel options to the boot entry. If that file doesn’t exists it falls back to /proc/cmdline which may have references to the wrong disk.
First we set the kernel options and update /etc/fstab to ensure that the root filesystem is remounted read-write as it would otherwise stay in read-only mode (which breaks a few things).
# Make sure kernel commandline is set correctly
# As we dd data from the primary disk to the secondary in the last step it is okay to take the UUID from the primary disk in this step
UUID=$(sudo blkid -s UUID -o value /dev/disk/by-id/google-proxmox-installer-part1)
echo "root=UUID=$UUID ro console=tty0 console=ttyS0,115200 earlyprintk=ttyS0,115200 consoleblank=0 intel_iommu=off" | sudo tee /etc/kernel/cmdline

# Update /etc/fstab (remove boot mount, update partition ID)
PARTUUID=$(sudo blkid -s PARTUUID -o value /dev/disk/by-id/google-proxmox-part1)
echo "PARTUUID=$PARTUUID / ext4 rw,discard,errors=remount-ro,x-systemd.growfs 0 1" | sudo tee /etc/fstab
The ESP we created on the secondary disk is empty. Using proxmox-boot-tool it is formatted and seeded with the installed kernels and a boot entry for systemd-boot is created.
# Initialize ESP
DEVICE=$(sudo readlink -f /dev/disk/by-id/google-proxmox)
sudo proxmox-boot-tool format ${DEVICE}p15
sudo udevadm settle -t 3
sudo proxmox-boot-tool init ${DEVICE}p15
To finalize we copy the bits from the primary disk (where we installed PVE) to the new secondary disk. It doesn’t matter if the sizes of the filesystem don’t line up as it will be grown on first boot.
# Move bits
sudo dd if=/dev/disk/by-id/google-proxmox-installer-part1 of=/dev/disk/by-id/google-proxmox-part1 bs=4M status=progress
Create image#
Installation and configuration iare now completed. In order to create an image we need to shut down proxmox-installer. Then we can create an image from the secondary disk.
export REGION=eu
export ZONE=europe-west4-a
export INSTANCE=proxmox-installer
export DISK=proxmox
export IMAGE=proxmox-v$(date '+%Y%m%d')
export FAMILY=proxmox

# Stop instance
gcloud compute instances stop $INSTANCE \
    --zone $ZONE

# Create image
gcloud compute images create $IMAGE \
    --storage-location $REGION \
    --source-disk $DISK \
    --source-disk-zone $ZONE \
    --family $FAMILY \
    --architecture X86_64 \
    --guest-os-features "UEFI_COMPATIBLE,GVNIC,IDPF"
Deploy PVE#
Now that we have the image create we can start a PVE node. The following script will create a new GCE bare-metal instance c4-standard-288-metal. This instance doesn’t run virtualized so is the ideal foundation to run Proxmox.
export ZONE=europe-west4-a
export INSTANCE=proxmox-02

gcloud compute instances create $INSTANCE \
    --zone $ZONE \
    --machine-type c4-standard-288-metal \
    --network-interface=nic-type=IDPF,stack-type=IPV4_ONLY,subnet=default,no-address \
    --tags=iap-ssh,iap-pve \
    --create-disk boot=yes,type=hyperdisk-balanced,image-family=proxmox,provisioned-iops=3000,provisioned-throughput=140,size=50 \
    --create-disk name=data-1,device-name=data-1,type=hyperdisk-balanced,provisioned-iops=3000,provisioned-throughput=140,size=500 \
    --metadata serial-port-enable=true \
    --maintenance-policy TERMINATE \
    --shielded-secure-boot \
    --shielded-vtpm \
    --shielded-integrity-monitoring
The command above will add another disk called data-1 to the instance. This can be used for VM disk storage and can be customized to the specific needs of the deployment.
The instance is not configured with a public IP so the PVE endpoint needs to be exposed through IAP or a public IP needs to be assigned.
Setup firewall rule for PVE through IAP#
In order to publish PVE through IAP a firewall rule needs to be created. The PVE node that we have deployed in the previous step already has a network tag configured (see --tags=iap-ssh,iap-pve in the previous section).
export NETWORK=default
gcloud compute firewall-rules create allow-pve-iap \
    --network $NETWORK \
    --priority 5000 \
    --direction INGRESS \
    --action ALLOW \
    --rules tcp:8006 \
    --source-ranges 35.235.240.0/20 \
    --target-tags iap-pve
Tunnel PVE through IAP#
Opening up a tunnel is pretty straightforward using gcloud and we are forwarding port 8006 from the local machine to the PVE node we have just created:
export ZONE=europe-west4-a
export INSTANCE=proxmox-01
export REMOTE_PORT=8006
export LOCAL_PORT=8006

gcloud compute start-iap-tunnel $INSTANCE $REMOTE_PORT \
    --project $PROJECT \
    --zone $ZONE \
--local-host-port localhost:$LOCAL_PORTFinish#
Now you should be able to log in and create your first VM running on Proxmox inside of a GCE bare-metal VM: